
Going back to basics in rearing pays off
To deliver a good rearing flock to the production farm, the basic criteria of good infrastructure and management need to be met. Owners or general managers cannot expect good results without giving their farm managers the tools to do the job. Going back to the basics of rearing will easily solve 90% of the problems.
By Winfridus Bakker, PS & GPS specialist, Cobb world technical support team USA
The key to obtaining good results in production is to make sure the rearing is done correctly. Many operations still lack basic infrastructure. For example, a shortage on feeder space, and only when enough feeder and drinker space is available, can management be fine-tuned to improve the production results. There are five stages up to 25 weeks of age that are crucial for success.
Stage One: Basic criteria
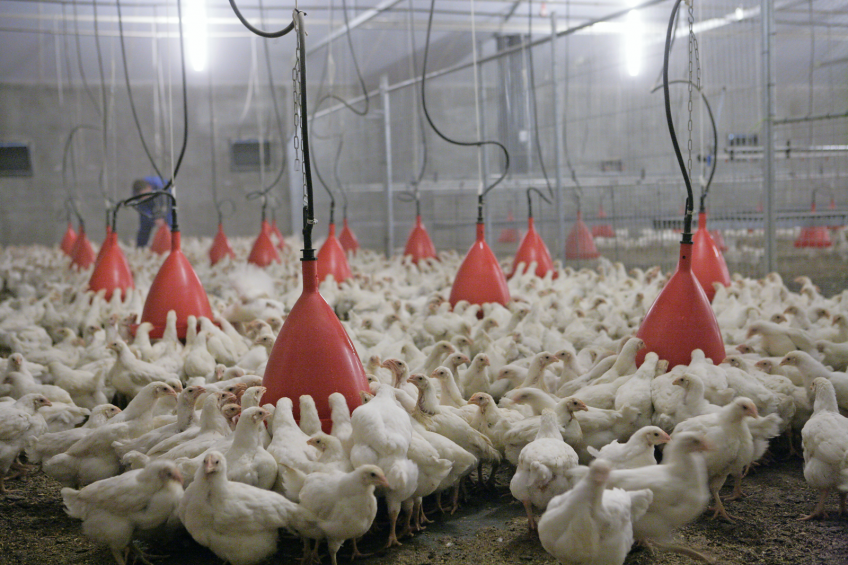
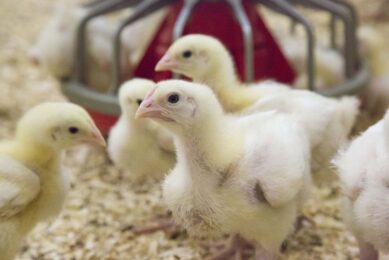
1. Provide enough feeder space, and open up the space gradually according to the age of the birds. A guide for chain feeders is given in Table 1. With pan feeders, calculate the number of grill openings and deduct two openings to have the maximum capacity of the pan feeder.
2. A fast feed distribution of 120 feet/minute (36 meters/minute) chain speed is needed. Ensure feed is in front of the birds in less than three minutes. Pan feeders with fully charged tubes will instantly provide feed.
3. Use a small chain feeder trough during rearing. In this way feed can be distributed around well and the chain used earlier from seven days of age. Using production troughs in rearing complicates feed distribution and does not help to maintain uniformity.
4. Good bird distribution over the whole house before feed distribution, will guarantee that feed is taken up by all the birds. Feeding in the dark and signal lighting helps to accomplish this. Try to avoid people moving outside the house before feeding, and only enter the house once the lights have come on.
5. Ensure enough water volume in the nipple lines after four weeks of age. Aim for 50-60 cc/minute water output per nipple, and check that crops are soft four to five hours after feed clean-up. This will guarantee normal feed digestion and help to maintain bodyweight uniformity.
6. Ensure good uniform crumble size or mash feed with no segregation of the feed ingredients.
7. Uniformity in equipment and installations between rearing and production is needed. This part is often overlooked and can induce many problems. Are we switching from pan to chain feeders between rearing and production, or from bell drinkers to nipple drinkers? How much difference in light intensity is there between dark-out rearing and production houses for good light stimulation?
a) With slats in production with mechanical nests, use training slats in rearing, so they are more mobile and active. Install them as early as two to three weeks of age.
b) Mobility is especially important in hens reared with pan feeders. Because the feed drops into all pans at once, the birds are quieter and need to learn how to jump on slats. With chain feeders, the birds are constantly jumping over the feeders to get to other side and so become more trained.
c) Hens need beak trimming when reared on a plastic pan feeder as the beaks will not wear down and ‘hawk beaks’ will develop by the end of rearing, causing serious issues with dehydrated hens that cannot drink and eat properly. Add to this reluctance to jump on the slats and the loss in birds can be considerable (2-5%). Sharp beaks can also lead to cannibalism.
d) Ideally, go from pan feeders in rearing to pan feeders in production, but avoid going from pan feeders in rearing to chain feeders in production. The opposite is much better, chains in rearing and pans in production or from chains in rearing to chains in production.
e) Have an increase between rearing and production of 10 times the light intensity, especially when using dark-out housing in production.
f) In production, use warm light (<3000K), while in rearing 3000-4000K is a good light frequency. Avoid very cold light in rearing (>6000K).
Only after these basics are met, you can concentrate on grading the birds. If the basics are not met, the grading will not succeed and only cause frustration because no positive results are seen. Providing enough feeding space is critical to maintain and/or improve uniformity in rearing.
Stage Two: 0-8 weeks
Enough attention needs to be applied in the first eight weeks to obtain high frame uniformity. This period can make or break a flock. Non-uniform framed pullets are very difficult to feed in rearing and in production, and the flock is normally not efficient. Flocks can lose between five to ten hatching eggs per hen housed, and it is more difficult to withdraw feed without incurring problems with persistency.
Do grading at an early age (two to three weeks of age) in three groups, and feed accordingly to achieve all the pens at eight weeks on bodyweight (BW) target. This means:
- The heavy group is more strongly feed restricted to control BW.
- The average group continues with normal feed increases.
- The low end group is fed more feed to recover as soon as possible and have at eight weeks of age the same shank length structure as the heavy and normal pen.
- An Excel template in lb and grams exists, which can be used to follow different weight groups and help focus on getting the groups to eight weeks of age on the same BW target.
Stage Three: 9-15 weeks
In this period let the BW float, meaning follow more or less the standard or let the birds even dip below this. Use the concept in Table 2, related to BW development of the birds in rearing.
Stage Four: 16-20 weeks
This is the second most important period in the life of the flock, the first one being the initial eight weeks for development of the frame.
The objective is to start the light programme at 21 or 22 weeks of age, but the flock needs to be ready. Based on experience, the bodyweight curve can be adjusted from 15 to 20-22 weeks, pushing it up when females are not ready at 21 or 22 weeks. Handling the birds is essential to ascertain how this conditioning is developing in the different crosses. Turn-up in BW at 16-20 weeks in females must be 34-38%.
This must be obtained to have enough fleshing and fat reserves on time. If the females are not in the right condition at 21-22 weeks, the bodyweight curve needs adjustment. In this case go 0.1 lb (50 g) higher at 20 weeks. The turn up will be higher and females should be better prepared at 21-22 weeks.
If a flock is not uniform at 16 weeks of age, do a fleshing in the whole flock. Under-fleshed birds should receive extra feed to obtain the proper development at 20 weeks.
No scales are needed, only evaluation of wing resistance and breast fleshing (see scoring in Figure 1).
Fleshing evaluation needs to be done together with manual weighings at 16 and then at 20-21 and 22 weeks, especially in the beginning of adopting the concept, to have an idea how the birds flesh out and deposit pelvic fat.
The moment of light stimulation is not dependent on age but on:
- The average dry BW (between 2.4-2.5 kg, depending on the type of female)
- A minimum of 95% of females need to have a fleshing score 3 and 4.
- A minimum of 90% of the females need to present pelvic fat.
Stage Five: 21-25 weeks
After transfer, light and feeding programmes must be managed properly. For open sided production houses or those with transparent curtains, the following matters are essential:
- Light stimulation should happen with the first increase being +3 or +4 hours.
- Flocks that go to autumn or winter can have 12 hours of natural light but flocks going to summer, or with more than 12 hours natural light after transfer, need to receive in rearing nine hours of total light when going to 13 hours natural daylight in curtain-sided houses.
- Maintain for two weeks 13 hours or less, then increase every two weeks with +1 hour to a total of 15 hours.
- More than 13 hours of natural light, means that the flock needs to be in condition at 21 weeks (147 days). From 21 to 22 weeks of age in the rearing farm, a light increase in intensity and light duration takes place (use 12 hours of light with up to 50 lux) and then transfer at 154 days to the natural curtain house. This should avoid over stimulation (double yolks, mortality issues, etc).
For closed or dark-out production houses, the following rules are valid:
- In production houses with solid-sided walls, transfer can be done at any age when the production farm has a dimmer. The moment of light stimulation can then be determined by female condition.
- The installation of LED lighting in production will enable low rearing light intensity to be maintained for a longer period.
- After the light stimulation, feed increases should be slow and for at least two to three weeks (week 23 to 25) be around 0.44 to 0.66 lb/100 (2-3 g/bird/week).
- Female preparation should be done before light stimulation and not afterwards when over stimulation will induce physiological problems.
Join 31,000+ subscribers
Subscribe to our newsletter to stay updated about all the need-to-know content in the poultry sector, three times a week.


 Beheer
 WP Admin
  Bewerk bericht